Dragon Medical Workflow Manager Administrator (transcriber or secretary) and Author (clinicians) e-Learning Modules are available through the training portal of the CITS Online desktop application - http://elearning.cornwall.nhs.uk
CITS provide training via Microsoft Teams for Dragon Medical Workflow Manager.
Users can choose to book themselves onto training. The Book Now system is available via the CITS Online icon, Training Portal, online course booking option on the top of the screen. Or please contact cornwall.ittraining@nhs.net
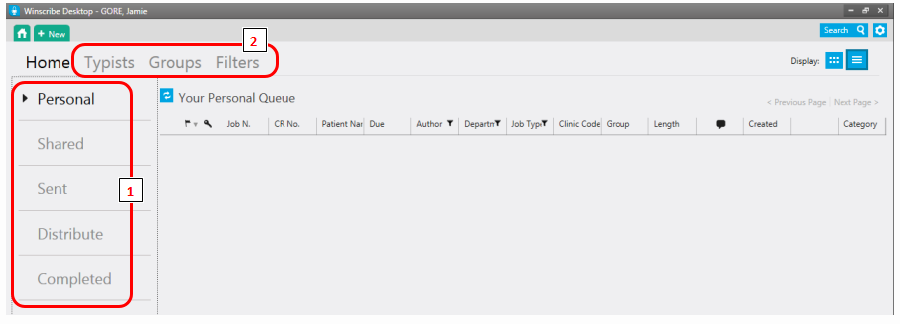
After logging in, you will be presented with your home screen.
From here you will be able to access the work of the specialty typing groups you have been allocated according to your job role.
1. You will not ordinarily need to make use of the workflow queues, unless you are also responsible for the transcription/distribution of correspondence.
2. The documents allocated to the specialist typist groups and individuals you are allocated can be located and managed within the Tabs at the top of the screen.

As a super user, you may need to reallocate documents between secretaries to redistribute workloads or enable cover for periods of leave or sickness. All of the typing groups’ workload can be viewed from within the Groups and Typists Tabs, where the resulting lists of jobs can be sorted and filtered to make them easier to manage.
Groups Tab- Clicking on the Groups Tab allows you to view a list of all of the documents currently allocated to any or all of the typing groups you take line management responsibility for. This shows all of the documents which are waiting for some action from the secretary at all stages of the workflow.
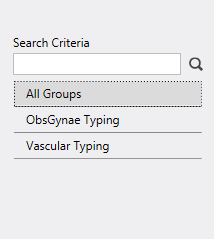
You will see a list of the groups you are permitted to access on the left of the screen, and you can search this list by typing the name of the group in the search box.
Clicking on the Typists Tab allows you to view a list of all of the documents currently allocated to a specific secretary. This shows all of the documents from all stages of their workflow.
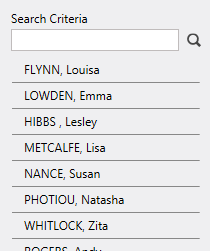
You will see a list of all of the secretaries/typists you take responsibility for on the left, and you can search this list by typing the name of the secretary in the search box. This shows secretaries from all typing groups in one list, so if you are responsible for more than one department, you will see all of the secretaries here.
Clicking on the name of a secretary will show a list of all jobs allocated to them for action.
To make these lists easier to use, they can be sorted by clicking on any of the column headers

It is not recommended that individual documents ordinarily be opened from these tabs as the user they are allocated to may already have them open and be working on them. If this is the case, the document will open as a read-only version. Clicking ‘type’ will enable you to work on the document but the original typist will find that the document closes and their changes are lost.
In order to better manage the above lists, you may also filter the list of documents by department, by job (document) type, or by author, so that you see only those documents. Filters can be saved. To use a saved filter in future, you will need to select it from the Filters Tab.
To create a filter, click on the funnel icon next to the criteria to filter by in the column header.

You will then be presented with a dialogue box for you to complete the conditions for your filters.
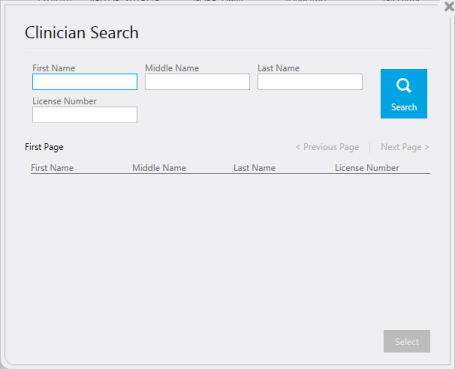
If filtering by author: Type in a combination of the First Name, any middle name, the last name or the licence number. Then click the search button.
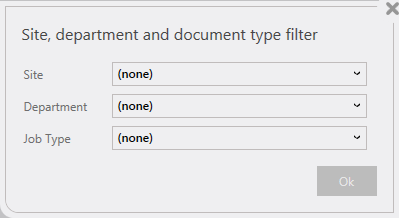
If filtering by department or job (document): From the drop lists choose a combination of the Site, the Department or the Job type. Then click the Ok button.
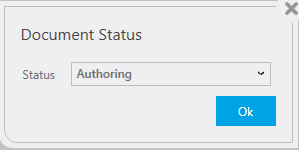
If filtering by Document Status: Choose the document status from the status drop list then click the Ok button.
The conditions of your filter will then be displayed above the list of documents and can be saved by entering a name for the custom filter then clicking the ‘Save’ button or removed with the ‘X’ button.

To use a saved filter in future, click the Filters Tab. Saved filters will be listed on the left of the screen.
Select your chosen filter from the list and then click the Typists or Groups tab to return to view the filtered lists of documents. Your filter will be applied to all of these lists until you remove it by clicking the ‘X’ button. This will remove your filter but it will remain saved for future use. You can remove parts of each filter without deleting it or saving your changes by clicking the ‘x’ against the individual filter criteria.
To delete a saved filter, click the ‘trash can’ icon next to the filter name under the Filters Tab.
In order to assess the distribution of workload, the Groups Tab view is most useful as this enables an overview of the work in progress and which typist each of the documents is currently allocated to.
In order to reallocate jobs from one secretary to another, however, best practice is to use the Typist Tab view.
The status of each of the documents is denoted by a symbol in the status column:
Documents awaiting typing, - can be allocated to another typist (moves it to her personal queue), or reallocated to the typing group (moves it to the shared queue)
Documents awaiting distribution, - while documents can be allocated to the group, this will show them in the distribute queue of all of the secretaries in the typing group. To prevent more than one secretary attempting to open this document at the same time, it may be more appropriate to reallocate documents awaiting distribution to a specific secretary.
In order to reallocate jobs from the Typist Tab:
Highlight each of the documents to be reallocated and right click.

Select ‘Allocate to Typist’ to reallocate the work to another specific typist.
Select ‘Allocate to Group’ if you wish to return the work to the typing group.
The search dialogue box will then open for you to select the typist or group you wish to allocate the documents to.
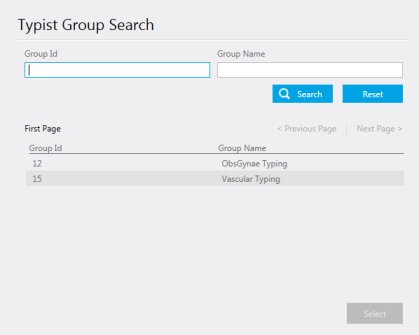
Carefully select and open the job for deletion

Once you are happy that this is correct document to delete, Click on the bin icon
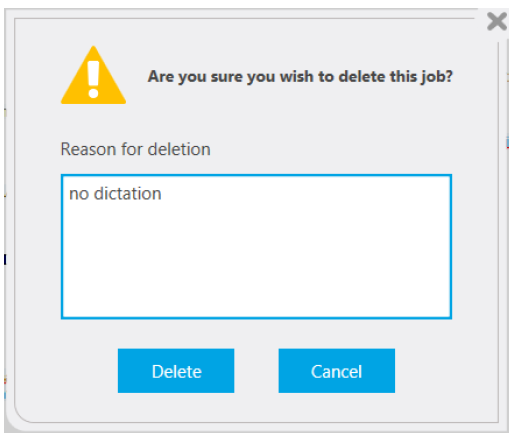
Enter a reason for the deletion in the text box (in this case I have entered ‘ no dictation’) – if the deletion ever needs to be retrieved this information will be helpful to reinstate the job. This cannot be done locally however, Winscribe will need to be contacted through CITS to reinstate any deleted jobs, so please be careful.
Then select ‘Delete’.
Dragon Medical Workflow Manager Reports are available using the following link: http://db-ssrs-1/Reports_WINSCRIBE_RS/report/Winscribe%20Text%20Reports%20-%2010.5/Performance_Dashboard_Index
Service Manager Report
This form will allow you to review your turnaround days across any given date range and your current backlog – in terms of numbers of documents.
Department
This form will provide you with a snapshot performance dashboard of:
You can also drill down into author and typist turnaround breakdowns from here.
Typists Overview
This form will allow you to check the productivity of your typists within a specialty. Caution - please bear in mind, that if a typist leaves a job open whilst on a break, this will not be reflected accurately within these stats. (In the next version of Winscribe there is a coffee break facility for transcribers to use to balance this out).
Exceptions
Documents waiting for typing, with no audio is valuable to for housekeeping. You can drill down into these jobs to find the job numbers to investigate further using Winscribe desktop. It may be necessary to delete these jobs in desktop, but you may need to ask the author first.
NB If the report you are running crashes, it is likely that the search criteria is too extensive (eg too large a date range). It may be necessary to break down one search into several.
Article ID: 49
Created: April 5, 2022
Last Updated: January 2, 2024
Author: Administrator
Online URL: https://elearning.cornwall.nhs.uk/site/kb/article.php?id=49