DMWM - Author Guide - Hybrid
Estimated Reading Time: 6 MinutesDragon Medical Workflow Manager
Author Guide, - Hybrid.
Log in & Device Calibration
Before logging in, ensure your dictation device is connected to the PC.
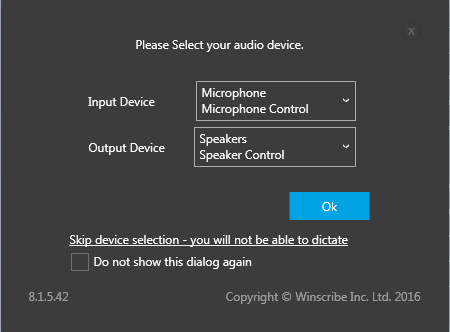
After clicking the icon to log in, you will need to calibrate your dictation device. You will be asked to do this each time you log into a different PC for the first time. After this, the system remembers your calibration settings for each PC you use.
Select the appropriate input or output devices from the drop lists, then click then Ok button.
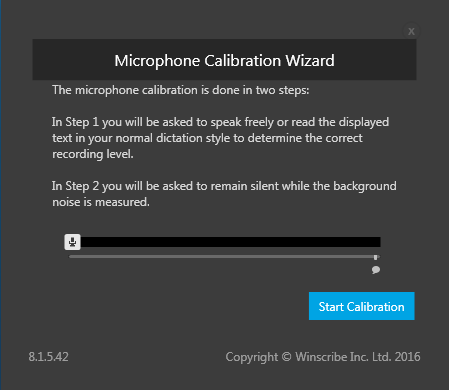
You will then be asked to calibrate your microphone using the Calibration Wizard.
Follow the on screen instructions. This may take a few minutes.
The Home Screen
You will be presented with your home screen. There are 3 main elements:
1. WORKFLOW:
On the top left of the screen under ‘My Work’ a set of tabs will display your ‘queues’ or workflow stages. Displayed are your ‘Drafts’ and ‘Sent’ Queues. These will be explained in the ‘Workflow’ section below.
2. CLINIC APPOINTMENTS:
If there is a clinic running today under your clinician code, you will see the appointments for this clinic extending down on the right of the screen. If not, this area will contain a message to indicate that there are no appointments for this date.
Winscribe automatically filters to show the clinic appointments for the logged in user. If you are working under another clinician’s code, you can alter these filters to show the clinic appointments for that clinician’s code
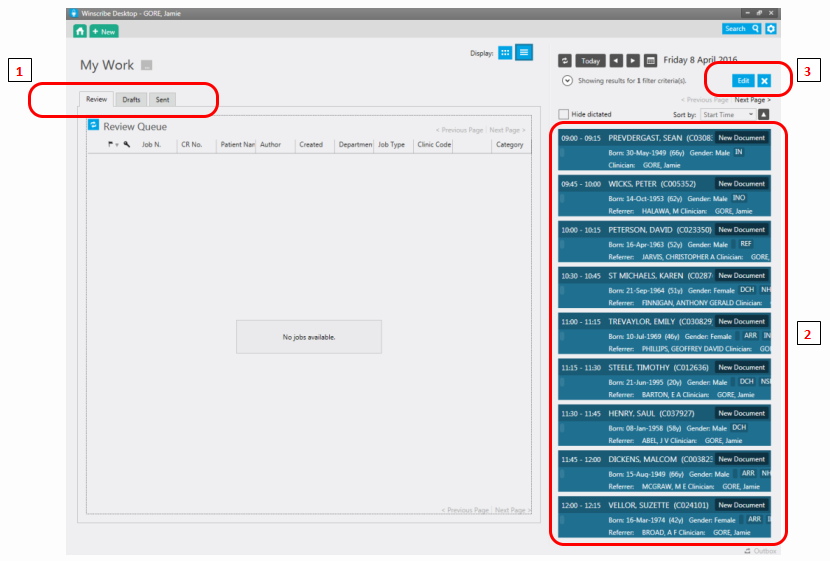
3. FILTER APPOINTMENTS:
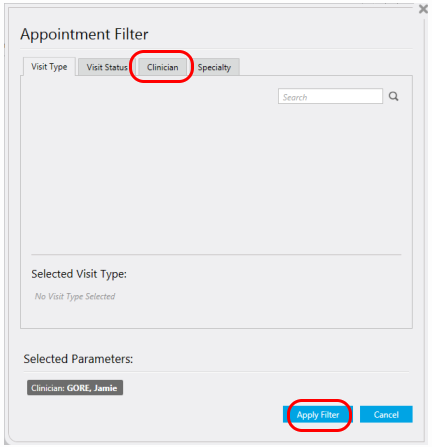
To filter the appointments for a different clinician, click the ‘Edit’ button.
The ‘Appointment Filter’ search box will appear. Select the ‘Clinician’ and delete any existing filters first.
Then tab and enter the clinician’s name in the search fields. Click the ‘Apply Filter’ button. You will be returned to the home screen and should see an updated list of appointments for the clinician you have chosen. Alternatively select the ‘Visit Status’ tab and type in the clinic code and apply this filter.
Producing a Document
In order to dictate and record a voice file, you will need to open a document. There are 2 ways to do this:
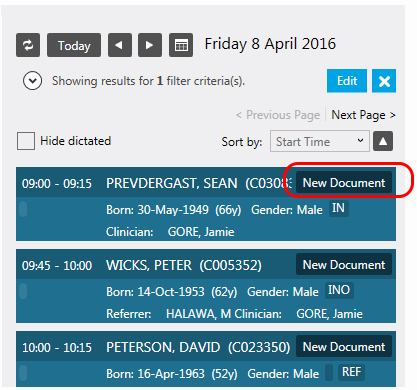
1. From a clinic appointment
This will pre-populate the patient’s details within the template. Click the ‘New Document’ button next to the patients name in the list of clinic appointments.
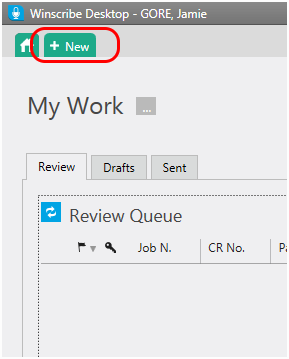
2. By opening a blank document
If dictating on results, for example; outside of a clinic environment.
This will require you to choose the patient in order to populate the template with their details. Click the ‘+New’ button at the top left of the screen.
Both methods will open a new document in the ‘job screen’. At this stage you will need to check the correct ‘Job Type’ the document template, the ‘Department’ if you work for more than one is selected. It is important to choose these carefully as these options cannot be changed later. These options display within the ‘patient banner’ at the top of the page.
Use the ‘Job Type’ and ‘Department’ drop down lists at the bottom right within the patient banner to make your selection.
If the patient banner is not open and these options are not visible, click anywhere to the right of the patient’s name at the top of the screen and the banner will open.![]()
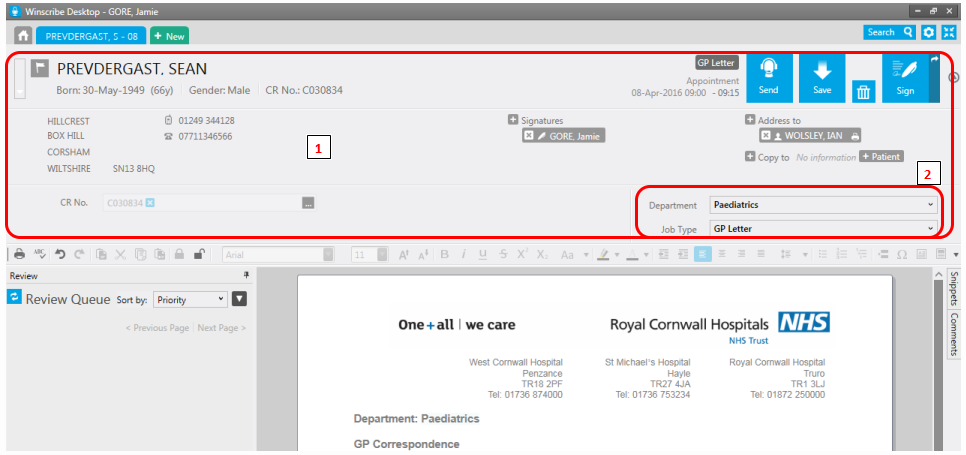
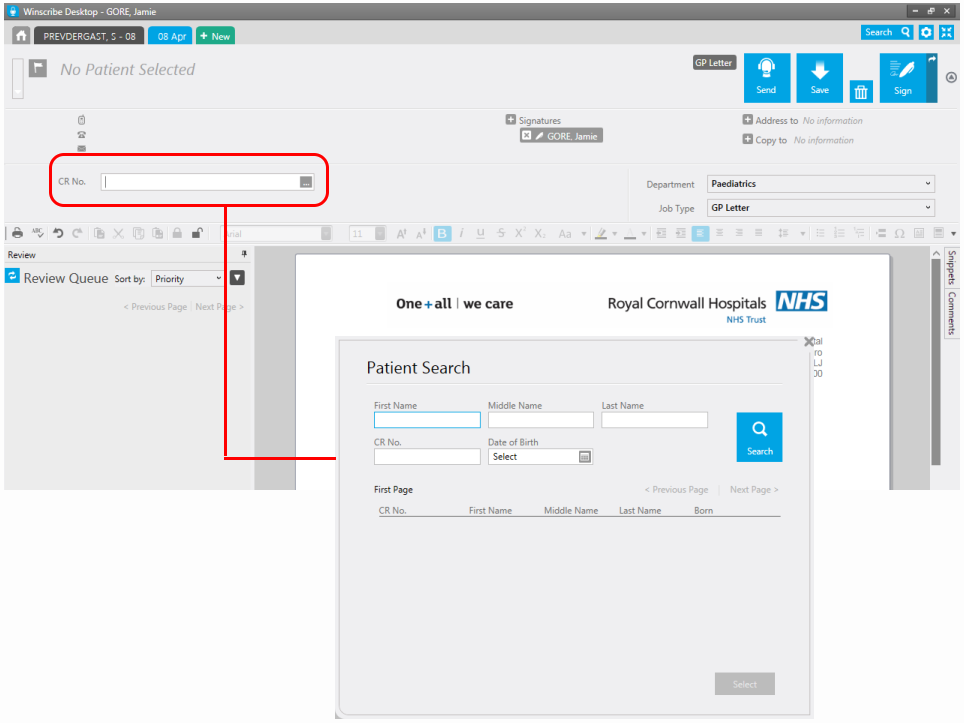
If you have created the document from the ‘+New’ button, you must also select a patient at this stage. If you know the hospital CR number you can type this directly into the CR No. field in the patient banner. Alternatively, click the ‘…’ button to display the patient search box. Enter the patient details, select the required patient, and click the ‘Select’ button.
All other addressee and C C details can be completed by the author from the options in the patient banner if they choose to, or this can be left for the secretary to complete.
Recording a Voice File
At the bottom of the job screen you will see the playbar. Here you will find the buttons to record, play back, stop etc. This can be controlled with your mouse or the buttons on your tethered dictation device. As you are dictating, please pay attention to the area highlighted. The highlighted area below should flash blue to signify that your voice is being recorded. If this does not occur, please check your microphone is plugged in and working.

The button to the right of the position slider allows you to manage your voice file by inserting extra or overwriting parts of your dictation. Move the position slider back to the required point in your dictation and click the insert/overwrite button to switch between the options.
Click so that the ![]() Overwrite icon is displayed to overwrite or the
Overwrite icon is displayed to overwrite or the ![]() Insert icon is displayed to insert.
Insert icon is displayed to insert.
For more help with speech recognition, please see the separate Best Practice Guide.
Miniview
Sometimes you may want to be able to read results or another document while you dictate. If you are not using front-end speech recognition, the Winscribe screen can be minimised to allow you to see other applications but simultaneously keep sight of the playbar to manage your dictation.
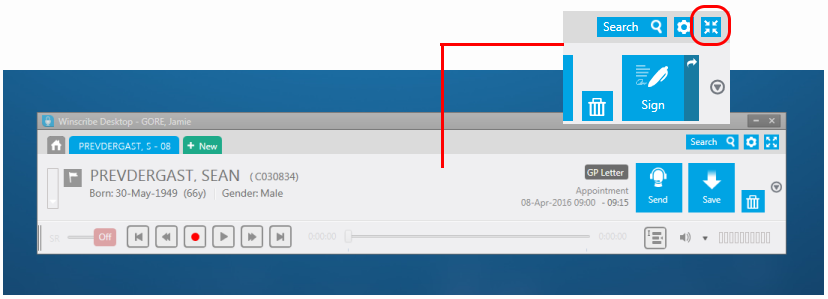
Within an open document, click the ‘MiniView’ button at the top right of the page to collapse the screen, and again to restore the full screen.
Comments & Urgent Documents
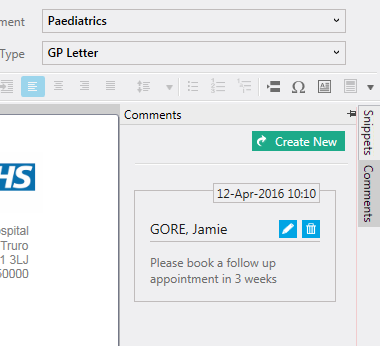
Comments enable you to communicate with the secretarial team without recording your instructions as part of the voice file or document text. These will need to be acknowledged by the transcriber before they can continue, so these cannot be missed. Like snippets, they should be added from the pop-out menu and can be dictated or typed.
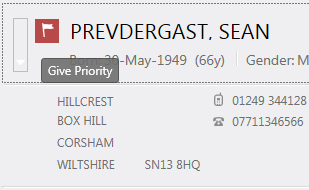
Documents can also be marked as urgent by clicking the ‘priority flag’ at the top left of the patient banner. This will highlight the document in red in the list to indicate to the secretary that it should be transcribed as a matter of priority.
Sending for Transcription
Once you have finished recording your voice file, your document can be sent to the secretarial team to be typed or amended. Click the ‘Send’ button at the top of the screen.
Alternatively, if you wish to save a document to come back to it later, click the ‘Save’ button. Your document will be stored in your ‘Drafts’ queue (see the ‘Workflow’ section below). DO NOT UNDER ANY CIRCUMSTANCES CLICK THE DONE BUTTON

After sending or saving your document, you will be returned to the Home Screen.
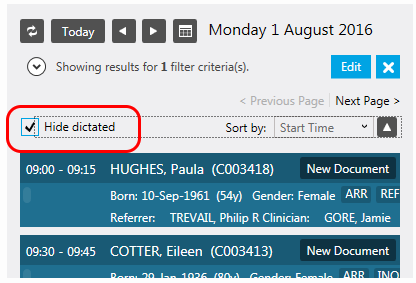
If you are working in a clinic and there are a number of clinicians working from the same appointment list, or you have a particularly long list, you may find it helpful to tick the ‘Hide Dictated’ check box at the top of the appointment list on the Home Screen.
This will hide all patient appointments that have already had a document created and either saved to the Drafts Queue or sent for transcription.